(last updated on October 5, 2022)
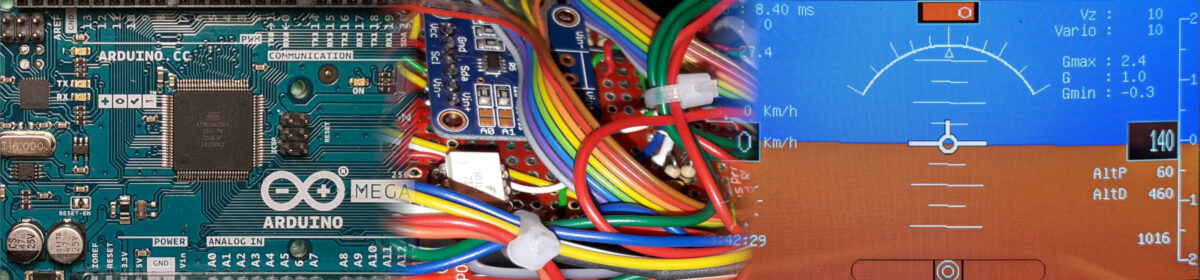
This subject is discussed in many Internet forums and Websites, often without providing a simple, straightforward and effective solution. This is an issue of concern in avionics, where independent modules must communicate and exchange numeric data, especially of the float type. A good example is our EFIS, where the AHRS and the remote magnetometer communicate with the main module. Serial transmission of single characters or strings is relatively easy, but sending and receiving multi-byte numeric variables is less intuitive, especially for floating-point numbers. There are several possible solutions; this page aims to outline the main ones, with their advantages and disadvantages. The best solution will have to meet these specifications: be efficient, have the most compact code possible, be usable whatever the type of numeric variable, whatever the type of serial transmission (UART or CAN bus), and not result in any loss of precision of the data transmitted.
Conversion to string
It must be said at the outset that this is the worst solution, yet it is very often mentioned in forums. Let us take, for example, the variable x of float type, whose value is 3.14159274. Via a UART serial line, the well-known Arduino function Serial.print (x, 8) will undoubtedly transmit the 10-character string “3.14159274” to the serial terminal, which might seem like a good start. But 10 bytes were transmitted, while the original float variable is only encoded on 4 bytes. So it’s not very efficient. The problems will accumulate during the reception. You will have to load the characters received one after the other, either in an object of String type or in an array of char (which will have to be oversized to accommodate numbers made up of many digits). We can then apply the toFloat () function to the String object or the atof () function to the char array. These functions take care of the conversion to a float-type variable. But these two functions round to 2 decimal places. Despite the profusion of resources consumed, the result is disappointing, the loss of precision is significant. It should also be remembered that the intensive and repeated use of String-type objects is not recommended because it can lead to random crashes. Char arrays should always be preferred. To rule out this solution, note that it is not always suitable for the classic CAN bus, whose message payload size is 8 bytes of data in each frame.
Spliting numeric variables into bytes without pointers
The goal is to break down the variables into bytes, in order to transmit these bytes one by one. Then do the reverse operation after reception. The method is relatively simple for integers, but becomes much more difficult for floating point values, whose binary storage format in memory is much more complex.
Let us take the example of an int16_t variable named a (16-bit signed integer) whose hexadecimal value is 0xF3E2. This variable consists of 2 bytes of values 0xF3 and 0xE2. To calculate these two bytes b and c, to be able to transmit them, it is necessary to use bitwise AND (&) and shift right operators, which is relatively simple. This gives :
int16_t a = 0xF3E2
char b = 0xF3E2 & 0xFF = 0xE2 (the & 0xFF is optional, because b is of type char)
char c = 0xF3E2 >> 8 = 0xF3
These two bytes can be sent via serial communication (UART or CAN). Upon reception, it is also relatively easy to reconstruct the original integer, using bitwise OR (|) and shift left operators, of course, paying attention to the order in which the bytes were sent and received.
int16_t a = (c << 8) | b
For a 32-bit integer, the procedure is the same, with a few more lines of code.
Things are somewhat different for floating point type variables. They are expressed as the product of two parts: the mantissa and a power of 2, in the following form:
± mantissa x 2 exponent
A float is stored in memory in 4 successive bytes, thus on 32 consecutive bits. The first bit is the sign bit, followed by an 8-bit value representing the exponent, and finally, 23 bits for the mantissa (representing about seven decimal digits). Under these conditions, it would be pretty tedious to use logical and shift operators, as for integers. For floats, it is not easy to get by without explicitly accessing their memory storage; see below the 3rd solution.
However, since we can easily break down integers into bytes, we could imagine converting floating point numbers into integers by multiplying them by a power of 10. For example, to transmit the floating point number 12.345, it would be first necessary to multiply it by 103 to obtain the integer 12345. This integer is easy to break down, transmit, reconstitute upon reception, and divide by 103 to find the initial floating point number. Lots of lines of code. What about a double type number (64-bit on ARM systems), like 12.3456789? It would be necessary either to multiply it by 107, thus obtaining a 64-bit integer (even more lines of code), or to accept losing the last digits.
So this technique is quite unsatisfactory. It could, at a pinch, be used for integers. Is it worth it? Indeed, the 3rd solution applies to both integers and floating points and fully meets the specifications indicated in the introduction.
Pointers and memory usage
As stated above, float type variables are stored in memory in 4 successive bytes, i.e., 32 bits. The same applies to integers of type int and unsigned int, also stored in 32 bits on ARM systems. The long long and double types are 8-byte (64-bit) encoded. The ideal solution for transmitting any numeric variable is actually transferring the contents of the 4 or 8 memory locations it occupies. So 4 or 8 bytes are to be transmitted one after the other. For the reception, you must first declare a variable of the same type. This variable is given a memory location of the proper size by the microcontroller, i.e., 4 or 8 bytes, from the free memory available. Then place (in the correct order) the previously received bytes into the memory locations reserved for this variable, which will then take the transmitted value.
The C / C ++ language used by our Arduino and Teensy microcontrollers makes this easy, as it allows memory access through pointers. A preliminary reminder on memory and pointers is necessary.
Memory is made up of fundamental building blocks, or cells. Each cell can store one bit of binary information. These cells are organized to form 8-bit locations, i.e., one byte. All these locations can be numbered one after the other, this is referred to as memory address or reference. Pointers “point” to a memory location at a particular address. Pointers behave like variables; they have a name, must be declared, and above all, what is fundamental, they are typed: a pointer of type char only points to a single 1-byte memory location. A pointer of type int16_t points to a 1-byte memory location, and the one that follows; a pointer of type float points to a 1-byte memory location, and the three following ones. The main downside to pointers is their syntax which, while very logical, is often a bit confusing when first discovered. We will explain the principles through several examples.
Here are examples of pointer declaration syntax. The asterisk between the variable’s type and name indicates that this variable is a pointer.
char * pPointerN; // pPointerN is a pointer of type char
int  * pPointerM; // pPointerM is a pointer of type int
In the examples above, pPointerN is of type “Pointer to char,” and pPointerM is of type “Pointer to integer.” At the declaration stage, a pointer does not point to anything, just like a declared variable that has no value yet.
To retrieve the value stored at the address indicated by a pointer in a variable, the syntax is as follows:
char N = *pPointerN;
int M   = *pPointerM;
An asterisk precedes the name of the pointer. Of course, the type of the variable must be the same as the type of the pointer. And for that to make sense, the pointer must have been initialized; that is, it is pointing to something. We will see a little further down how to initialize a pointer.
So * pPointerN is a value, and pPointerN is a memory address (or reference as stated above). The ‘*’ character is called the dereference operator.
To obtain the address where a variable is stored, we precede its name with the character ‘&’, called the reference operator. Thus, &N and pPointerN denote the same address in the examples above.
We can declare a pointer by giving it a value:
char N;
char *pPointerN = &N;

int  M;
int  *pPointerM = &M;
You can also assign an address (a value) to a previously declared pointer:
pPointerN = &N; //provided that both variables are of the same typeYou can modify a pointer by adding or subtracting an integer value to or from it. The result is a pointer of the same type as the initial pointer; we move forward or backward in the memory by a number of bytes equal to the size of the pointer type multiplied by the added or subtracted value. Be careful not to move out of the desired memory block with this operation, as the compiler will not complain. Consequently, if we want to move by a single memory byte using the incrementation of a pointer, the latter must necessarily be of a type encoded on a single byte. To illustrate this, see the example below.
char N;
char * pPointerN;
pPointerN = &N;
pPointerN ++; // move forward by 1 memory byte

uint32_t  M;
uint32_t  * pPointeurM = &M;
pPointeurM ++; // move forward by 4 memory bytes
We could then imagine having access to the four contiguous memory locations of the variable M of type uint32_t from the previous example by using the pointer of type char pPointerN, like this:
pPointerN = &M;But that is prohibited in C / C ++. If we try to do so anyway, the compiler vigorously protests with the following message: ”cannot convert ‘uint32_t*’ to ‘char *’in assignment“. We will see below that there is an alternative.
Another fundamental notion about pointers: the name of an array behaves like a pointer. To put it more precisely, the name of an array acts as a pointer to the first element of the array. For example, if we have declared:
char list[4] = {'A', 'B', 'C', 'D'};Then list [1] and * (list + 1) are equivalent, returning the 2nd character of the array, i.e., the char ‘B’; list is a pointer of type char which contains the address of the first char of the array, which is ‘A’, whose index is [0], list + 2 contains the address of the 3rd char, * (list + 2) returns ‘C’… etc.
One last essential thing to know is how we can force type conversion. By forcing the conversion, it is possible to explicitly convert a value (and not a variable) into any type. This is called explicit type casting. The general syntax for type casting operations is as follows:
(type) expression
Below is an example with ordinary variables:
char A = 3;
int B = 2;
float C;

C = A/B;         // integer division 3/2 : return 1.0
C = (float)A/B;  // floating point division 3.0 / 2 : return 1.5
You can do the same thing with pointers. If we declare:
int16_t i = 0xF3D2;Then the expression & i is the value of a pointer of type int*. We can explicitly typecast this pointer to a char* type by writing (char *) & i. This new pointer points to the memory location of the variable i, which behaves like an array of 2 char. So ((char *) & i) [0] is the value of the first byte of the integer i, i.e. 0xD2 and ((char *) & i) [1] is the value of the second byte of integer i, i.e. 0xF3 .
Another example:
int32_t a = 0xF4E3D2C1;
Serial.println(    ((char*)&a)[0]  ,HEX   ); // Return C1
Serial.println(    ((char*)&a)[1]  ,HEX   ); // Return D2
Serial.println(    ((char*)&a)[2]  ,HEX   ); // Return E3
Serial.println(    ((char*)&a)[3]  ,HEX   ); // Return F4
This is precisely what we were looking for! Namely breaking down a numerical value into bytes. It works regardless of the variable type, 16, 32, or 64 bits, integer, or floating point. Last example:
double dbl = 123.45678912345678;
Serial.println (dbl, 14); // Return 123.45678912345678
for (uint8_t i=0; i<8; i++) {
  Serial.print (((uint8_t*)&dbl)[i]);
  Serial.print(" - ");
} // Return 150 - 154 - 114 - 8 - 60 - 221 - 94 - 64 -
In this last example, we have broken down a 64-bit, double-precision, floating-point variable into its 8 bytes, which we sent via USB serial to the Arduino IDE terminal. We will now see how to perform the opposite operation: reconstituting this variable from its 8 bytes. The code is as follows:
uint8_t list[8] = {150, 154, 114, 8, 60, 221, 94, 64};
double varDouble;
varDouble = *(double*)list;
Serial.print (varDouble,14); // Return 123.45678912345678
The explanation of this code is simple. An 8-byte array has been filled in with the values received via the serial line in the previous step. We declare a variable of type double and assign it the value encoded by the 8 bytes of the array. To do this, remember that list is not only the name of the array but also a pointer of type uint8_t, pointing to the address of the first element of the array. By writing (double *) list, we explicitly typecast this pointer to the double* type. And by preceding this new typecasted pointer with an asterisk, we obtain the value stored at the address pointed to by this pointer. Note that the 8 bytes are very easily transmitted over a CAN bus since it is the length of a standard CAN message.
This method, therefore, fully meets the specifications set out in the introduction: compact and efficient code, usable whatever the type of numeric variable, whatever the type of serial transmission (UART or CAN bus), and without any loss of accuracy of the data transmitted. This is, of course, the technique we use in our sketches.